Detail-first origami makers
If miniature folds, layered edges or paper texture are your main subjects, the lens’s close-focusing and magnification capabilities deserve particular attention.


Choose the lens around the photographs you need: frame the complete origami model comfortably first, then decide how much magnification its smallest folds require. A 1:1 macro lens suits details that need to fill much of the image, but close working distances can crowd the lighting; stable support, soft even light and a neutral background matter alongside the camera.
If miniature folds, layered edges or paper texture are your main subjects, the lens’s close-focusing and magnification capabilities deserve particular attention.
For instructions, listings or an archive, repeatable lighting and a neutral background help you show paper colours consistently. The Royal Academy of Arts recommends soft, even light, while National Museums Scotland advises using a neutral background to avoid colour casts.
If you photograph models from above and sometimes record folding steps, consider where the support, screen and lights will fit around your table before choosing a camera.
Decide whether complete models or tiny details are harder for you to photograph, then plan the camera position and lighting around that choice.
| Concern | What to check | Who this matters to |
|---|---|---|
| Whole models and close details | Check the exact lens’s maximum magnification and whether its field of view lets you frame the complete model from your available camera position. | If tiny creases need to fill the photograph, I would prioritise close focusing without losing room for whole-model shots. Around 36% of consumers put close-up detail first. |
| Paper colour | Check white-balance controls and RAW capture if you intend to edit; plan for a neutral background and soft, even light. | When making a catalogue or set of instructions, I need paper colours to look consistent from one photograph to the next. Colour consistency comes first for around 29% of consumers. |
| Overhead framing | Check that stable support fits your table and that you can see the screen from the intended shooting position. | With little space around the table, I need to compose from above without shifting the camera between shots. Around 21% of consumers give that overhead workflow priority. |
| Stills and video | Check the exact body’s video features and whether the chosen lens can focus at your intended table distance. | If I also show folding steps, I want the same setup to handle finished photographs and occasional clips. That combined use is the primary need for around 14% of consumers. |
Close-up capability belongs to the exact lens, not the camera body. Canon specifies up to 0.5x magnification for its RF 35mm F1.8 MACRO IS STM, while Nikon and Sony specify 1:1 for the macro lenses discussed below.
Decide how large the smallest detail must appear, then check the lens’s maximum magnification and focusing distance before choosing a kit.
You may need a separate close-up or macro lens for detail photographs.
Harsh shadows and colour casts can obscure the folds and change how the paper appears. The Royal Academy of Arts recommends soft, even light; National Museums Scotland advises a neutral background.
Plan where the lights, background and stable camera support will go before settling on a body.
A tripod or overhead support, backdrop and soft-light equipment may take up additional table space.
If accurate shape matters, a tilted camera can change how the model’s edges appear. The Royal Academy of Arts also cautions that a wide-angle view can distort edges.
Align the lens with the plane you most need to represent accurately, and test the framing before photographing a full set of models.
Sony specifies a 2.4 cm minimum working distance for the E 30mm F3.5 Macro. At close focus, the lens can leave little space between camera and model for lighting.
Map out the camera, model and light positions if that short working distance is central to your plan.
The arrangement may call for smaller light modifiers or a different lens position.
The EOS R50 and RF 35mm F1.8 MACRO IS STM form an interchangeable-lens route for complete-model photographs and moderate close-ups.
The Z50II with NIKKOR Z MC 50mm f/2.8 is a route to prioritise when fine fold details need substantial magnification.
The α6700 and E 30mm F3.5 Macro offer another APS-C camera-and-lens route for detailed tabletop photographs.
The Sony Alpha ZV-E10 II K kit is a camera choice for framing origami photographs with an included zoom lens and recording occasional video. If miniature folds are your priority, check the included lens’s close-focus capability before choosing this kit.
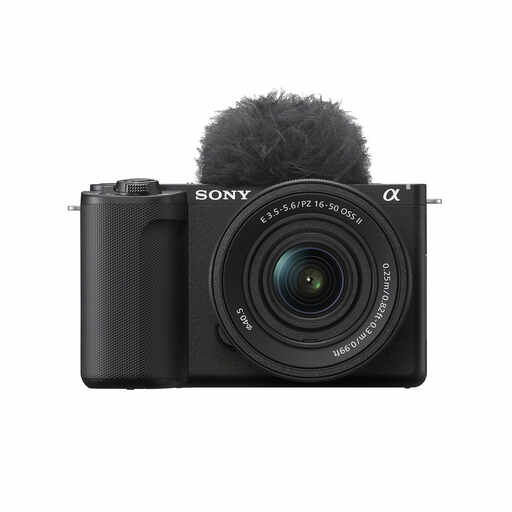 Image unavailable
Consider this kit if you want an included zoom lens for tabletop framing and also plan to record folding clips.
The product name specifies 26 megapixels and 4K60p video. For photographs of tiny folds or paper texture, check the included lens’s maximum magnification and minimum focusing distance.
Not if your main photograph needs to show the entire model. A 1:1 macro lens becomes more relevant when tiny folds or paper texture must fill much of the frame; check its working distance as well, because close focusing can restrict light placement.
Use stable support and align the lens with the main plane you want to represent accurately. A self-timer or remote release can help you take the photograph without moving the camera.
Start with a neutral background and soft, even light, as advised by National Museums Scotland and the Royal Academy of Arts. Avoid mixing light sources, set white balance for the lighting you use and consider RAW capture if you plan to adjust colour afterwards.
Statutory remedies may apply under the Consumer Rights Act 2015 if the camera fails to meet the required standards. Check the circumstances and timing of the fault against GOV.UK consumer guidance rather than treating a retailer’s change-of-mind policy as the limit of your rights.