
24/7 Customer Support

Free returns

Same-day & Next-day Delivery

Quality Guaranteed

Unlock Your Welcome Offers: FREE Delivery | Up to 80% OFF | Free 30-day JoyPlus trial
Download the APP
Embarking on a tiling project, whether it's a kitchen splashback or a full bathroom renovation, can be incredibly rewarding. However, the difference between a flawless, durable surface and a disappointing result often comes down to having the right equipment. With so many options available, it can be difficult to know which tiling tools are truly necessary and which are just marketing hype.
This guide is designed to cut through the clutter. We will walk you through the essential tools required for cutting, setting and grouting, helping you select the right equipment for your specific project. Whether you are a seasoned professional tiler or a first-time DIY enthusiast, our focus is on providing practical advice to help you achieve a clean, long-lasting finish.
Before you start adding items to your basket, it is wise to understand what makes a tool suitable for your needs. A well-chosen set of tools not only makes the job easier but also significantly improves the quality of the outcome.
You do not need to purchase a large, pre-packaged DIY tiling kit to get started. Often, it is more cost-effective to buy individual, quality tools that suit your specific project. The three fundamental stages of tiling each require specific equipment:
Not all tile cutting tools are created equal. The type of tile you are working with will dictate the most appropriate cutting method.
The final stage, grouting, is what gives your project a polished, professional look. The quality of your grouting tools is paramount. A flexible grout float is essential for pressing grout firmly into the joints, ensuring complete coverage and a strong bond. Following this, a good grouting sponge is crucial for cleaning off excess grout without pulling it out of the joints, leaving you with clean lines and a smooth surface.
Based on functionality, durability and user feedback, we have selected a few key items that offer excellent value and performance for a range of tiling jobs.
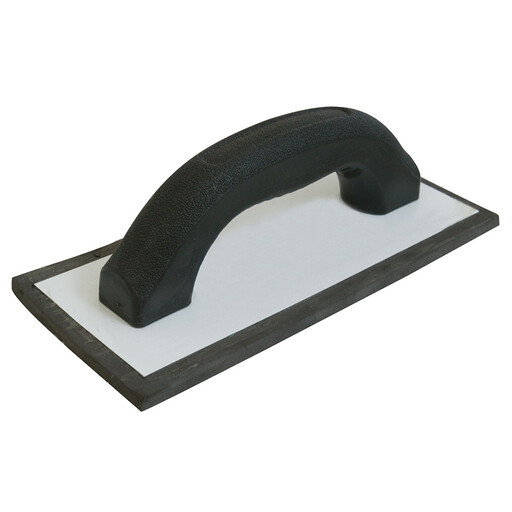
Why It Stands Out: This grout float is an excellent example of a simple tool designed to do its job effectively. Its primary advantage is the lightweight construction, featuring a compressed foam base and a comfortable handle. This design reduces hand fatigue during larger jobs and allows for easy manoeuvring, which is particularly useful for applying grout smoothly and evenly.
Pros:
Who is it for? This is a practical choice for both DIYers tackling their first tiling project and professional tilers who need a reliable, lightweight float for everyday jobs and repairs.
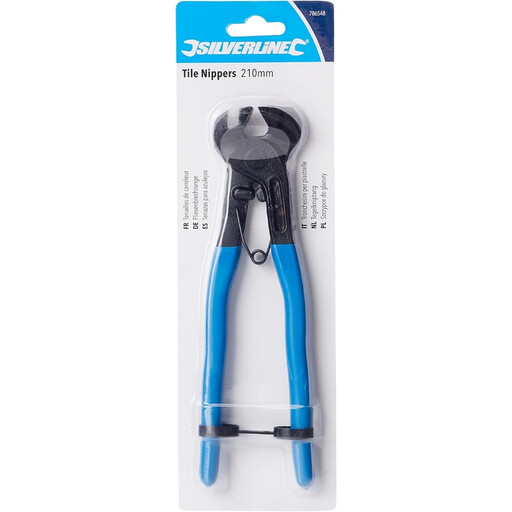
Why It Stands Out: When you need to make small, irregular or curved cuts that a large tile cutter cannot handle, these tile nippers are the tool for the job. They are equipped with tungsten carbide-tipped jaws, which are known for their hardness and durability, ensuring they remain sharp for precise cutting. The sprung handles automatically reopen after each cut, reducing the effort required and making repetitive work much more comfortable.
Pros:
Who is it for? Essential for anyone needing to tile around pipes, sockets or other obstacles. Both professional tiler tools kits and DIY arsenals will benefit from the precision these nippers offer.
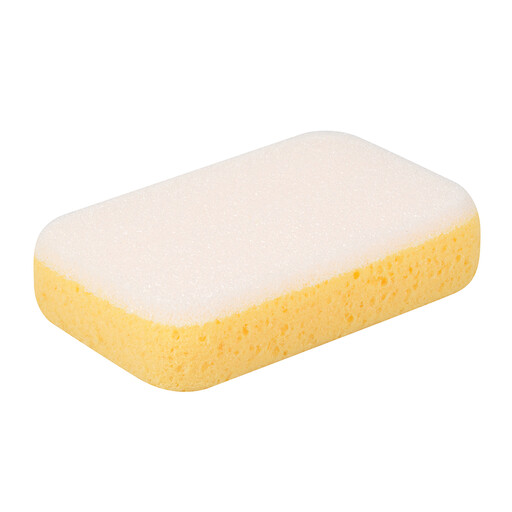
Why It Stands Out: A simple sponge can make or break your finish. The Silverline Grouting Sponge is specifically designed for tiling, with a density that is effective for cleaning excess grout from the tile face without dragging it from the joints. Its generous size allows you to cover more area with each pass, speeding up the clean-up process. The durable material holds up well to repeated rinsing and use.
Pros:
Who is it for? This is a non-negotiable item for anyone tiling. From first-timers to experienced tradespeople, a high-quality grouting sponge is fundamental to achieving a clean, professional-looking result.
With your tiling project sorted, you might be considering the next step in your room's transformation. A fresh coat of paint can complement your new tiles perfectly and complete the look.
For a contemporary and stylish finish, explore our selection of silver wall paint to find the ideal shade for your space.
For a first-time project, you should focus on a few key items: a notched trowel to apply adhesive, a tile cutter or tile nippers for shaping tiles, a grout float to apply grout, a large grouting sponge and at least two buckets—one for mixing and one for clean water.
Yes, most tiling tools, such as floats, sponges and cutters, can be used for both wall and floor applications. The main tool that may need to change is the notched trowel. The size of the notches depends on the size and type of the tile you are laying, not whether it is on a wall or floor. Larger tiles typically require a trowel with larger notches to ensure adequate adhesive coverage.
Proper maintenance is key to longevity. Clean all tools with water immediately after use to remove all traces of tile adhesive and grout before they harden. This is especially important for trowels and floats. After washing, dry any metal tools thoroughly to prevent rust. A well-maintained set of tools can last for many years.